Temperature
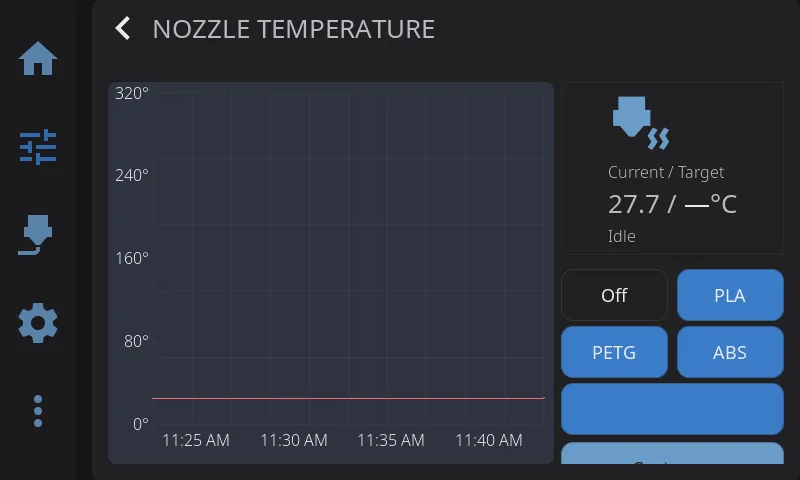
Nozzle Temperature Panel
Section titled “Nozzle Temperature Panel”- Current temperature: Live reading from thermistor
- Target input: Tap to enter exact temperature
- Presets: Quick buttons for common temperatures
- Temperature graph: History over time
Bed Temperature Panel
Section titled “Bed Temperature Panel”Same layout as nozzle control:
- Current and target temperature
- Presets for common materials
- Temperature graph
Temperature Presets
Section titled “Temperature Presets”Built-in presets:
| Material | Nozzle | Bed | Chamber |
|---|---|---|---|
| Off | 0°C | 0°C | 0°C |
| PLA | 210°C | 60°C | — |
| PETG | 240°C | 80°C | — |
| ABS | 250°C | 100°C | 50°C |
Tap a preset to set the target temperature immediately. If your printer has a chamber heater, presets that include a chamber temperature will set it automatically — materials that don’t need an enclosed chamber (PLA, PETG) leave the chamber heater off.
Spool Preset
Section titled “Spool Preset”When you have a filament loaded — either via an external spool configuration or an active AMS slot — and the material doesn’t match one of the standard presets (PLA, PETG, ABS, TPU), an additional spool preset button appears below the standard presets.
The spool preset shows the material name and recommended temperature (e.g., “PA-CF (265°C)”). Tap it to set the temperature for that specific material. This appears on both the Nozzle and Bed temperature panels.
Multi-Extruder Temperature Control
Section titled “Multi-Extruder Temperature Control”On printers with multiple extruders, an extruder selector appears at the top of the Temperature Control panel:
- Tap an extruder to switch which one you are controlling
- Each extruder has independent temperature targets and presets
- Toolchanger printers show tool names (T0, T1) rather than “Nozzle 1”, “Nozzle 2”
- The selector only appears when Klipper reports more than one extruder
Single-extruder printers are unaffected — the panel works exactly as before.
Chamber Temperature Panel
Section titled “Chamber Temperature Panel”If your printer has a chamber heater or chamber temperature sensor configured in Klipper, you can access the Chamber Temperature panel a few ways: tap the chamber row in the Temperatures widget, or add the dedicated Chamber Temperature widget to your Home Panel and tap it. Both open the temperature graph overlay focused on the chamber.
- Heated chambers (
heater_generic chamber): Full control panel with current/target temperature, presets, and a live temperature graph with a green trace - Sensor-only chambers (
temperature_sensor chamber): Monitoring mode — shows the current chamber temperature and graph, with a “Monitoring” status instead of heating controls. Presets and target input are hidden since there’s no heater to control.
The chamber panel works identically to the nozzle and bed panels, just with chamber-specific presets and colors.
Heating vs. Maintaining vs. Off: On printers that coordinate the chamber heater and a cooling fan (such as the Creality K2), the chamber status shows one of three states:
- Off — no chamber temperature is being held
- Maintaining — holding a cooling ceiling of 40°C or below. The printer isn’t actively heating; it’s keeping the chamber from rising above your setpoint (useful for materials like PLA in an enclosure). The displayed target is the ceiling it’s holding.
- Heating — actively heating the chamber to a setpoint above 40°C (for materials like ABS or ASA)
You set any of these the same way — just pick a preset or enter a temperature. The printer decides whether to maintain or heat based on the value, and the panel shows which it’s doing.
Cooldown: When you tap Off or cool down the printer, HelixScreen also turns off the chamber heater (if present) along with the nozzle and bed.
Temperature Graph Overlay
Section titled “Temperature Graph Overlay”Tap any temperature card (nozzle, bed, or chamber) on the Controls or Print Status panels to open the unified temperature graph overlay. This single overlay replaces the separate per-heater graphs with a combined view.
Layout
Section titled “Layout”The overlay has a side-by-side layout:
- Left (66%) — Live temperature graph with all sensors plotted together
- Right (33%) — Heater controls for whichever sensor you tapped (presets, target temperature, custom input)
If you have a chamber sensor with no heater, the right column shows the current temperature but hides the preset buttons and custom input since there’s nothing to control.
Sensor Chips
Section titled “Sensor Chips”Above the graph, a row of sensor chips lets you toggle which traces are visible:
- Each chip shows a colored dot matching its graph line and the sensor name
- Tap a chip to show or hide that sensor’s trace
- When you open the overlay from a specific card, only the relevant sensor is shown by default — tap other chips to add more traces
- Chips wrap across multiple lines if you have many sensors
Graph Features
Section titled “Graph Features”- Solid line — Current temperature
- Dashed line — Target temperature (for heaters)
- Auto-scaling Y axis — Adjusts range automatically based on visible temperatures
- Color-coded traces — Nozzle (red), Bed (cyan), Chamber (green), additional sensors (yellow, purple, orange, blue)
Multi-Extruder Support
Section titled “Multi-Extruder Support”When multiple extruders are configured, the nozzle controls include an extruder selector row. Tap an extruder to switch which one the right-column presets and target apply to. Each extruder’s temperature trace is shown independently on the graph.
Setting Temperature
Section titled “Setting Temperature”From the right column:
- Tap a material preset (Off, PLA, PETG, ABS) to set that temperature immediately
- If a non-standard filament is loaded, tap the spool preset to set the recommended temperature for that material
- Tap Custom… to enter an exact temperature via the on-screen keypad
Next: Motion & Positioning | Prev: Printing | Back to User Guide