Calibration
HelixScreen provides built-in tools for the most common Klipper calibration tasks.
Looking for touchscreen calibration? See the Touch Calibration Guide.
Bed Mesh
Section titled “Bed Mesh”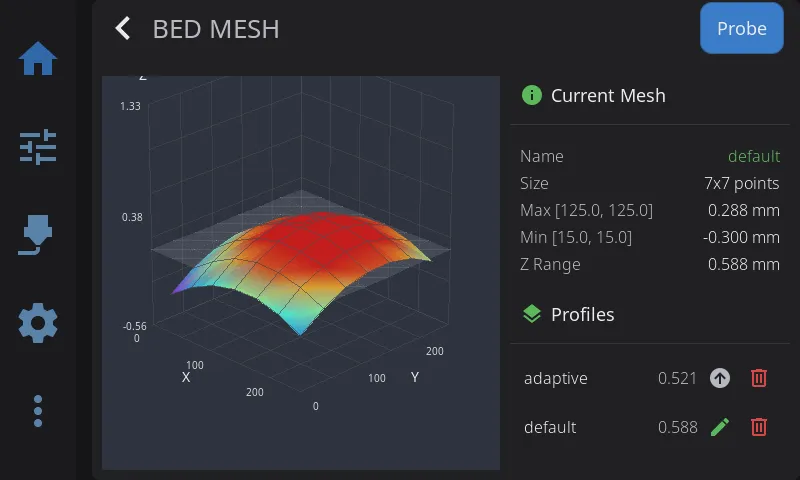
The Bed Mesh panel has two parts: a 3D visualization of your bed surface on the left, and information cards on the right.
Visualization (left):
- Color gradient: Blue (low) to Red (high)
- Touch to rotate the 3D view
- When no mesh is loaded, the panel shows a “No mesh loaded” placeholder
Current Mesh card (right): shows the active profile name, mesh size (probe-point grid), highest and lowest points, and the overall Z range (variance).
Probe a new mesh: tap Probe in the panel header to run a fresh bed mesh calibration.
The visualization mode (3D, 2D, or Auto) can be changed in Settings > Display.
Profile Management
Section titled “Profile Management”The Profiles card on the right lists your saved mesh profiles. Each row shows the profile name and its Z range, with action icons on the right:
| Icon | Appears on | What It Does |
|---|---|---|
| Load (up arrow) | Inactive profiles | Loads that saved mesh, making it the active profile |
| Rename (pencil) | The active profile | Opens the rename dialog (see below) |
| Delete (trash) | Every profile | Removes that saved profile |
Tapping a row (or its Load icon) loads that profile.
Renaming a profile:
- Tap the pencil icon on the active profile
- The rename dialog shows the current name and a field for the new name
- Enter a new profile name and tap Rename
After renaming or deleting, HelixScreen asks “Save changes to persist them across restarts?” Profile changes only live in memory until saved:
- Tap Save to write the change to your printer’s saved configuration. This persists the change across restarts but restarts Klipper.
- Tap Don’t Save to keep the change for the current session only — it will be lost when the printer reboots.
Screws Tilt Adjust
Section titled “Screws Tilt Adjust”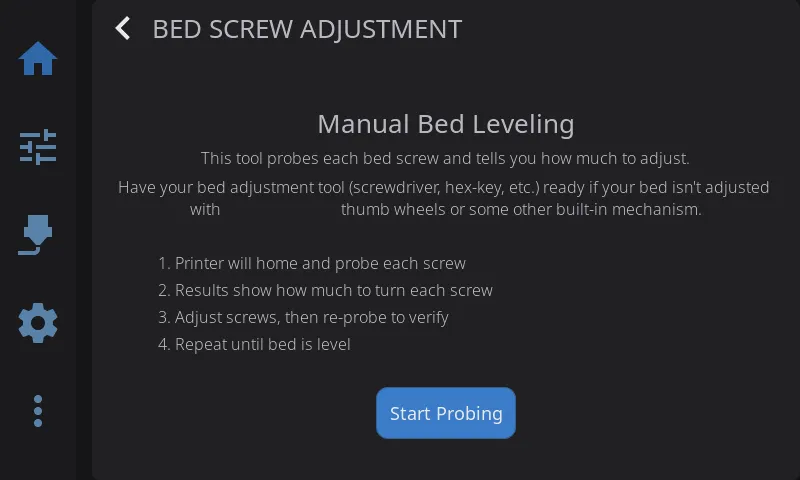
Assisted manual bed leveling:
- Navigate to Advanced > Screws Tilt
- Tap Measure to probe all bed screw positions
- View adjustment amounts (e.g., “CW 00:15” = clockwise 15 minutes)
- Adjust screws and re-measure until level
Color coding:
- Green: Level (within tolerance)
- Yellow: Minor adjustment needed
- Red: Significant adjustment needed
Input Shaper
Section titled “Input Shaper”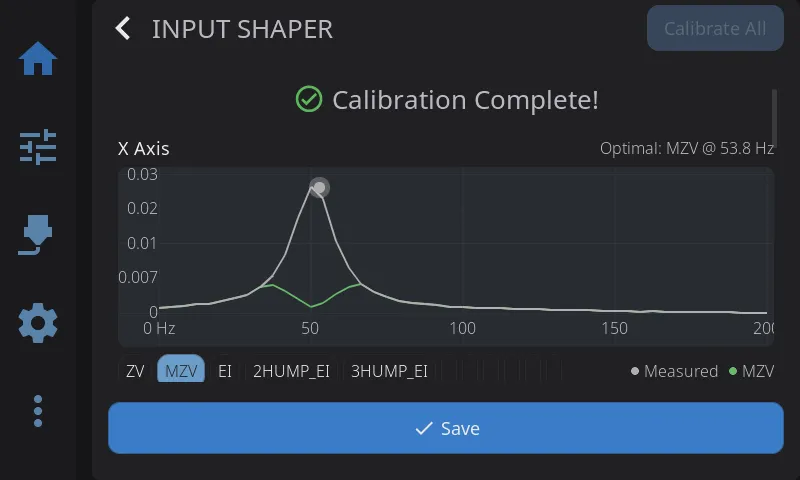
Tune vibration compensation for smoother, faster prints:
- Navigate to Advanced > Input Shaper
- Review your current shaper configuration displayed at the top
- Pre-flight check verifies accelerometer is connected
- Select axis to test (X or Y)
- Tap Calibrate to run the resonance test (5-minute timeout applies)
- View frequency response chart with interactive shaper overlay toggles
- Review the comparison table showing recommended shaper and alternatives (frequency, vibration reduction, smoothing)
- Tap Apply to use for this session or Save Config to persist
Chart features:
- Toggle different shaper types on/off to compare their frequency response curves
- Platform-adaptive: full interactive charts on desktop, simplified on embedded hardware
- Per-axis results shown independently
Requirement: Accelerometer must be configured in Klipper for measurements. If no accelerometer is detected, the pre-flight check will show a warning.
Probe Management
Section titled “Probe Management”View and control your Z probe from Advanced > Probe Management. HelixScreen auto-detects your probe type and shows the appropriate controls.
Supported probe types:
| Probe | Detected As | Type-Specific Controls |
|---|---|---|
| Cartographer | Cartographer | Calibrate, Touch Cal, Scan Cal |
| Beacon | Beacon | Calibrate, Auto-Calibrate |
| BTT Eddy / Mellow Fly Eddy | Eddy Current | Calibrate, Drive Current Cal |
| BLTouch | BLTouch | Deploy, Stow, Reset, Self-Test |
| Voron Tap | Voron Tap | — |
| Klicky | Klicky | Deploy, Dock |
| Standard probe | Probe | — |
Universal actions (all probe types):
| Button | What It Does |
|---|---|
| Accuracy Test | Runs PROBE_ACCURACY to check probe repeatability |
| Z-Offset Cal | Opens the interactive Z-offset calibration panel |
| Bed Mesh | Opens the bed mesh calibration panel |
Configuration: Tap any config row (X/Y offset, samples, speed, retract distance, tolerance) to edit probe settings directly — changes are saved to your Klipper config with a firmware restart.
Z-Offset Calibration
Section titled “Z-Offset Calibration”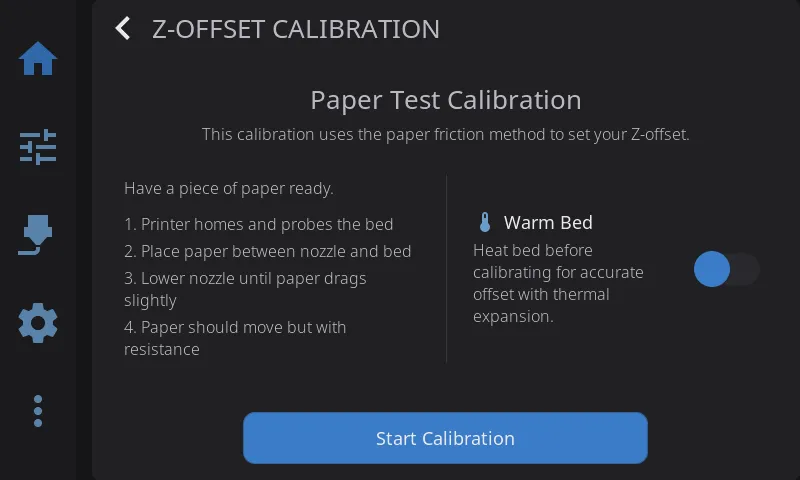
Interactive panel for dialing in your Z-offset when not printing. Works with all probe types — Cartographer, Beacon, BLTouch, eddy current probes, and standard probes.
- Navigate to Advanced > Z-Offset, or tap Z-Offset Cal in the Probe Management overlay
- Optionally enable Warm Bed to heat the bed before calibrating (accounts for thermal expansion)
- Tap Start — the printer homes and begins the calibration sequence
- Use the +/− adjustment buttons to lower the nozzle (paper test: adjust until paper drags slightly)
- Tap Accept when satisfied, or Abort to cancel
- The offset is saved to your Klipper config automatically
HelixScreen picks the right calibration command for your setup (PROBE_CALIBRATE, Z_ENDSTOP_CALIBRATE, or SET_GCODE_OFFSET) based on your printer’s detected probe configuration.
Quick access: A Z Calibration button is also available on the Controls panel for one-tap access.
Belt Tension (Beta)
Section titled “Belt Tension (Beta)”Uneven belt tension is one of the most common causes of print quality issues on CoreXY and Cartesian printers. Loose or mismatched belts produce visible artifacts like layer shifts, vertical fine artifacts (VFAs), and ringing/ghosting. HelixScreen’s Belt Tension tool measures the resonant frequency of each belt path and compares them, giving you a clear picture of your belt tension balance.
How It Works
Section titled “How It Works”Every belt has a natural resonant frequency determined by its length, mass, and tension — just like a guitar string. Tighter belts vibrate at higher frequencies. On a CoreXY printer, the two diagonal belt paths (Path A and Path B) should have very similar frequencies, meaning their tension is balanced.
The Belt Tension tool:
- Vibrates each belt path using
TEST_RESONANCES - Records the vibration with your accelerometer
- Computes a frequency spectrum (PSD) to find the peak resonant frequency
- Compares the two paths and provides a recommendation
Requirements
Section titled “Requirements”- Accelerometer (ADXL345, LIS2DW, or MPU) configured in your Klipper
printer.cfg - CoreXY or Cartesian kinematics (auto-detected)
- Optional: A
[pwm_cycle_time]LED pin for stroboscopic fine-tuning
No accelerometer? The strobe fine-tuning mode can still be used to visually identify belt resonance using a phone strobe app — no accelerometer needed for that step.
Running a Belt Tension Check
Section titled “Running a Belt Tension Check”- Navigate to Advanced > Belt Tension (requires beta features enabled)
- Review the hardware summary card showing your detected kinematics, accelerometer status, strobe LED availability, and target frequency
- Tap Start Check
- The printer homes (if needed), then runs a resonance sweep on each belt path
- A progress bar shows the measurement status (“Measuring Path A… / Path B…”)
Reading the Results
Section titled “Reading the Results”When the measurement completes, the results screen shows:
Path A and Path B cards:
- Measured frequency in Hz
- Status indicator: Good, Needs adjustment, or Out of range
Comparison section:
- Frequency Delta — the difference between Path A and B in Hz. Ideally under 5 Hz; over 15 Hz means adjustment is needed
- Path Similarity — how closely the vibration profiles match (Pearson correlation). Above 90% is excellent; below 70% suggests uneven tension
Recommendation card:
- A specific, actionable message like “Tighten Path A belt to match Path B” or “Belt tension looks good!”
Status thresholds:
| Status | Condition |
|---|---|
| Good (green) | Within target frequency range |
| Needs adjustment (orange) | Moderately off target |
| Out of range (red) | Far from target, or large A/B imbalance |
Interpreting Frequencies
Section titled “Interpreting Frequencies”Target frequency defaults to 110 Hz, which is typical for Voron-style CoreXY printers. Different printer designs may have different ideal frequencies — check your printer’s documentation.
| Frequency | Meaning |
|---|---|
| Both paths match, near target | Belt tension is balanced and correct |
| Both paths match, but low | Belts are balanced but too loose — tighten both equally |
| Both paths match, but high | Belts are balanced but overtightened — loosen both equally |
| Paths differ significantly | Tension is unbalanced — tighten the lower-frequency belt |
Strobe Fine-Tuning Mode
Section titled “Strobe Fine-Tuning Mode”After getting initial results, tap Visual Fine-Tune (Strobe) for precise belt tension matching. This mode vibrates the belt at a specific frequency while a strobe light flashes in sync — when the belt appears to “freeze” (stand still), you’ve found the resonant frequency.
With a PWM strobe LED:
If your printer has a [pwm_cycle_time] LED configured in Klipper, HelixScreen automatically syncs the LED strobe to the motor excitation frequency. Watch the belt under the strobe and adjust frequency with the +0.5 Hz / -0.5 Hz buttons until the belt appears stationary.
Klipper configuration for strobe LED:
[pwm_cycle_time strobe_led]pin: <your_gpio_pin> # Any available GPIO connected to an LEDvalue: 0 # Start offcycle_time: 0.01 # Default (will be changed dynamically)Without a strobe LED (phone app fallback):
HelixScreen shows the current frequency and recommends phone strobe apps you can use:
- Android: Strobily, Strobe Light
- iOS: Strobe Light Tachometer, myStroboscope
Set the app to the displayed frequency, aim your phone at the belt, and adjust until the belt appears frozen.
Locking frequencies:
Use the Lock A and Lock B buttons to record the resonant frequency you found for each path.
- Run the check after any belt adjustment to verify your changes had the desired effect
- Tap “Test Again” on the results screen to re-run without leaving the panel
- Path A corresponds to the 1,1 diagonal on CoreXY printers (both motors moving the same direction). Path B is the 1,-1 diagonal (motors moving opposite directions). Check your printer’s documentation for which tensioner adjusts which path
- Temperature matters — belt tension can change slightly with temperature. Run the check at your typical operating temperature for the most accurate results
Heater Calibration (PID / MPC)
Section titled “Heater Calibration (PID / MPC)”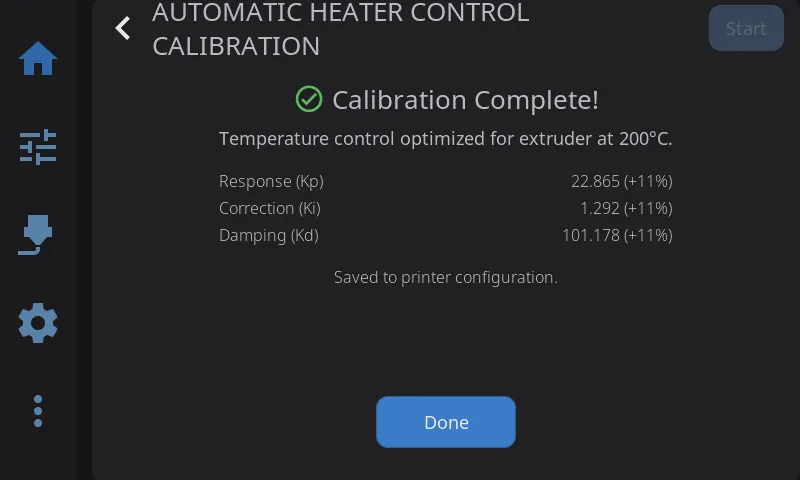
Calibrate temperature controllers for stable heating. HelixScreen supports two calibration methods:
- PID — Classic proportional-integral-derivative tuning. Works on all Klipper firmware.
- MPC (Beta) — Model Predictive Control. A physics-based thermal model that can provide more stable temperatures. Requires Kalico firmware (a Klipper fork with MPC support).
PID Calibration
Section titled “PID Calibration”- Navigate to Advanced > Heater Calibration
- Select Nozzle or Bed
- Choose a material preset (PLA, PETG, ABS, etc.) or enter a custom target temperature
- Optionally set fan speed — calibrating with the fan on gives more accurate results for printing conditions
- Tap Start to begin automatic tuning
During calibration:
- Live temperature graph shows the heater cycling in real-time
- Progress percentage updates as calibration proceeds
- Abort button available if you need to stop early
- A 15-minute timeout acts as a safety net for stuck calibrations
When complete:
- View new PID values (Kp, Ki, Kd) with old-to-new deltas so you can see what changed
- Tap Save Config to persist the new values to your Klipper configuration
Tip: Run PID tuning after any hardware change (new heater, thermistor, or hotend) and with the fan speed you typically use while printing.
MPC Calibration (Beta — Kalico Only)
Section titled “MPC Calibration (Beta — Kalico Only)”If you are running Kalico firmware and have beta features enabled, a Method selector appears with MPC and PID options. HelixScreen auto-detects Kalico — the selector only appears when it is detected.
- Navigate to Advanced > Heater Calibration
- Select MPC in the Method selector (marked with a BETA badge)
- Select Nozzle or Bed
- Choose a target temperature preset
- For nozzle calibration, select a fan calibration level: Quick (3 points), Detailed (5 points), or Thorough (7 points) — more points improve accuracy but take longer
- If switching from PID to MPC for the first time, enter your heater wattage (check your heater’s rating — typically 40–60W for hotends)
- Tap Start
First-time MPC switch: If your heater is currently configured for PID, HelixScreen will automatically update your Klipper configuration to MPC mode and restart Klipper before beginning calibration. A progress screen shows “Updating Configuration…” during this step.
When complete:
- View MPC model parameters: Heat Capacity, Sensor Response, Ambient Transfer, and Fan Transfer (nozzle only)
- Results are automatically saved to your Klipper configuration
See Also
Section titled “See Also”- Motion & Positioning — Jog controls used during manual calibration
- Settings: Printing — Machine limits and Z movement configuration
- Printing — Z-offset fine-tuning during active prints
Next: Settings | Prev: Label Printing | Back to User Guide