
Connection
This content is for 1.1 (beta). Switch to the stable release docs.
Settings > Connection is about how HelixScreen reaches your network and your printers. Come here to join a Wi-Fi network, check your Ethernet connection, add or switch printers, or point HelixScreen at a different Moonraker address.
On the Settings screen, the Connection row shows how the screen is connected right now: the Wi-Fi network name (for example Wi-Fi HomeNet), Ethernet, or Not connected.
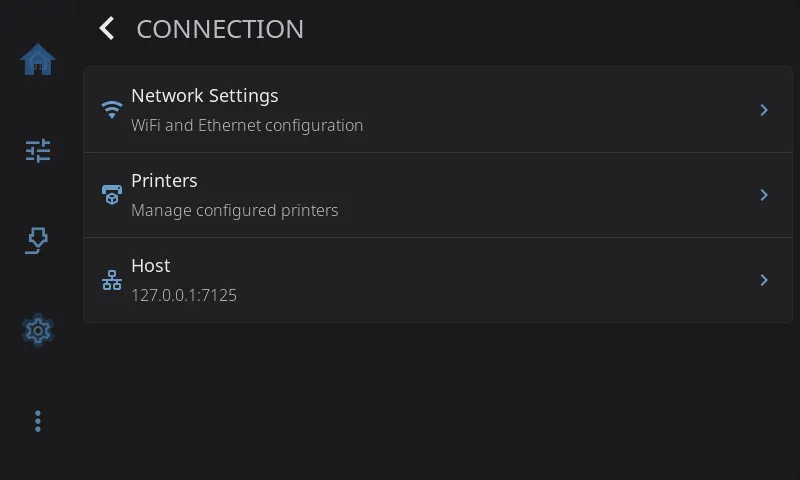
Network Settings
Section titled “Network Settings”Hidden on Android, where the phone or tablet manages its own network.
Opens the network screen. It has two columns.
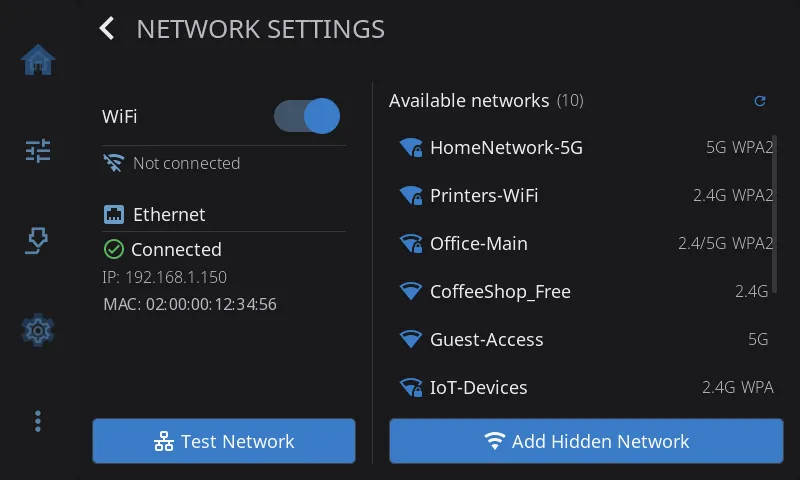
Left: your connection
- WiFi: turn Wi-Fi on or off and see the network name, IP address, MAC address and signal strength. A 2.4GHz tag appears if your hardware only supports that band.
- Ethernet: the IP and MAC address of the wired connection. Read-only.
- Test Network: checks that the internet is reachable. Greyed out when nothing is connected.
Right: available networks
- The Wi-Fi networks in range, with their signal strength.
- Tap a network to join it. Enter the password if it asks.
- Add Hidden Network joins a network that doesn’t broadcast its name.
- Refresh scans again.
Joining Wi-Fi while Ethernet is connected shows a warning first that the wired connection will drop, because some boards have one network chip and can’t use both at once (#1542). If joining fails, the screen tells you why. If an administrator has blocked the Wi-Fi radio (for example with rfkill), HelixScreen leaves it blocked unless you set up Wi-Fi in HelixScreen on that printer (#1697).
Printers
Section titled “Printers”Opens Manage Printers, the list of every printer this screen knows about.
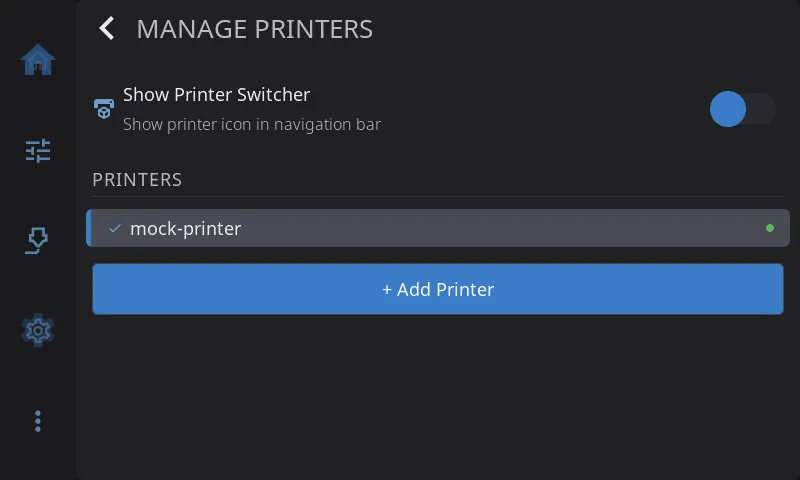
- Switch printers: tap a printer in the list. HelixScreen disconnects from the current printer, connects to the new one, confirms with a message and takes you to the Home screen.
- Add a printer: tap + Add Printer. The setup wizard runs for the new printer, skipping the Wi-Fi and language steps you already did. You can cancel at any time and go back to your current printer.
- Delete a printer: tap the trash icon next to a printer you aren’t using and confirm. You can’t delete the last printer.
- Show Printer Switcher: adds a printer icon to the navigation bar, so you can switch printers from any screen.
See Getting Started for adding a second printer.
Shows the Moonraker address HelixScreen is connected to, such as 192.168.1.50:7125.
To connect to a different address:
- Tap Host.
- Enter the printer’s IP address or host name, and the port (usually 7125).
- Tap Test Connection. Save unlocks once the test succeeds.
- Tap Save. HelixScreen disconnects and reconnects at the new address.
Host names are looked up again every time HelixScreen reconnects, so if your router gives the printer a new IP address, HelixScreen finds it again without a restart.
Back to Settings | Prev: Safety & Alerts | Next: Language & Time